

A road trip can fail on a detail the brochure never mentioned. The hotel is listed as accessible, but the route from the parking lot to the room has a step. The overlook has accessible parking, but the path to the view doesn’t work for the traveler who parked there. The next suitable restroom is two hours down the road. Each place on the itinerary looked fine on its own, and the trip still doesn’t hold together.
That happens when a trip is planned from destinations first and access second. This guide reverses the order. Access needs go in at the start, as constraints that shape the route, the overnight stops, the facilities and the daily schedule. An accessible attraction is one part of an accessible journey, and the rest of the journey has to work too.
Accessible Road Trip Planning at a Glance
| Access Need | Potential Planning Gap | What to Verify |
|---|---|---|
| Mobility | A step-free route from parking to a room, restroom or viewpoint, and transfer or boarding points | The entrance, parking, restroom layout, the route between them and the vehicle configuration |
| Vision | Wayfinding, signage and lighting, and getting information in a usable format | Large print, Braille or audio description, staff assistance and route details |
| Hearing | Alerts, announcements and communication at lodging and programs | Visual alerts, written communication, captioning and interpreter request lead times |
| Stamina and fatigue | Walking distance, elevation, seating and rest points between stops | Distance from parking, grade, seating and time per stop |
| Medical equipment and support | Power, storage, charging, supplies or refrigeration between overnight stops | Outlets and charging access, storage and nearby facilities |
These are examples of what to check. Each traveler’s list will differ.

Why “Accessible” Needs a Second Question
“Accessible” isn’t a yes or no label. The useful question is whether this specific facility or feature meets this traveler’s actual requirements. A label answers part of that. A few examples show the difference:
- An accessible hotel room and the complete journey from parking to that room are separate questions.
- Accessible parking at an overlook and the route from the parking area to the viewpoint are separate questions.
- An accessible visitor center and an individual trail are separate questions.
- A step-free restaurant entrance and an accessible restroom are separate questions.
None of this means accessibility information is unreliable. It means information written for everyone may not answer the question you have. The planning method below is about asking the second question before you commit.
Step 1: Define Access Needs Before Choosing Destinations
Start with the traveler, not the map. Sort what you know into four groups:
- Non-negotiable requirements, without which a stop or a route can’t work.
- Preferences, which matter but can flex.
- Features that need confirmation before you rely on them.
- Needs that affect the whole journey, as opposed to particular stops.
This is the hard and soft constraint method from our road trip planning guide, applied to access. A hard constraint is something the trip can’t proceed without. A soft constraint can change without ruining it. Don’t assume anything about another person’s needs. Ask them, or write down your own.
Finish this step with a short list you can use to test every route and stop. If an option fails a non-negotiable, it’s out. If it fails a preference, it’s a trade-off.
Step 2: Choose a Route Based on Confirmed Access
Pick the route from the access you’ve confirmed, not from the destinations that advertise themselves. A route is more than its stops. It’s the places to sleep, the restrooms, the food, the parking, the attractions and the options for help when something goes wrong, including roadside assistance and an alternative road.
That can mean a slightly longer route is the better one. A direct road with no confirmed restroom or lodging for a long stretch may be a worse trip than a longer one that passes through towns where you’ve confirmed what you need. Don’t recommend or accept a destination just because it’s marketed as accessible. Confirm it against your list.
Step 3: Identify the Access Gaps Along Your Route
An access gap is the stretch between confirmed places or facilities that meet a traveler’s specific access requirements. It’s a Miles & Mapped planning framework, not an industry term. The principle is to plan between confirmed access points, not between places that merely advertise themselves as accessible.
To find the gaps:
- Map the locations that meet your requirements.
- Look at the stretches between them.
- Decide which facilities are essential.
- Confirm that those facilities are available.
- Identify alternatives before you leave.
Check restrooms, parking, lodging, food, fuel and charging, visitor centers, attractions and any boarding or transfer points. The gap isn’t always measured in miles. Time, operating hours, access conditions and whether an alternative exists all count. A confirmed restroom that closes at five doesn’t help a six o’clock arrival. Our service-gap planning guide covers fuel, charging, food and lodging gaps in more detail, and the same logic works for access.
Step 4: Verify Accommodation and Vehicle Arrangements
Accommodation
An accessibility label doesn’t confirm the feature you need. Under the Americans with Disabilities Act’s rule for lodging reservations, places of lodging have to identify and describe their accessible features in enough detail for a guest to judge whether a room meets their needs, and to reserve an accessible room the same way as any other. That rule applies to covered lodging, and some privately owned units are exempt, so confirm what applies to your booking. It’s a reason to ask specific questions.
Questions to adapt to your own requirements:
- Is the entrance step-free?
- Is the parking arrangement suitable?
- Does the bathroom layout fit your needs?
- Is the route from parking to the room suitable?
- Are elevators available where you need them?
- Are there any temporary access limitations?
Vehicles
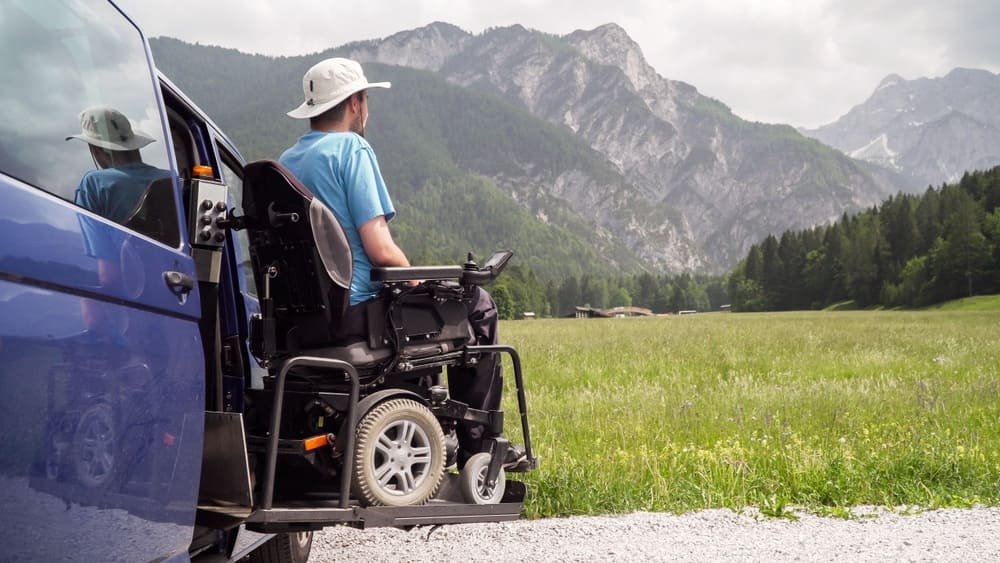
A standard vehicle with extra cargo space isn’t a wheelchair-accessible vehicle. Hand controls, wheelchair-accessible vans and storage space are three different needs. Department of Justice settlements with large rental companies have set advance-notice terms for hand controls, but the ADA doesn’t require rental companies to install lifts or buy lift-equipped vehicles. Wheelchair-accessible vans often come from specialist providers, and availability isn’t the same at every location.
Confirm the vehicle configuration, the pickup and return arrangements and any advance-booking requirement. Make this arrangement early, because it’s the one that’s hardest to fix at the counter. Our RV road trip guide covers larger vehicles.
Step 5: Plan National Parks and Attractions Individually
Accessibility varies from park to park and within a park. A park’s general accessibility page doesn’t answer every question about a trail, a shuttle, a restroom or a viewpoint, so check each one. The National Park Service’s accessibility planning page points to each park’s own contact information, and it lists examples of arrangements travelers can request, such as sign language interpreters, accessible campsites and accessible transportation options.
Notice periods differ. Yellowstone’s accessibility page asks for at least three weeks’ notice for sign language interpreters at ranger programs, while Sequoia and Kings Canyon asks for at least seven days and preferably two weeks. Yellowstone also lists large print and Braille versions of its official map and guide and audio description headsets. Those are park-specific arrangements, not rules for every park. Check seasonal changes and closures as well, using our road conditions guide for the method. NPS service animal information is on its own page.
The America the Beautiful Access Pass
The Access Pass is available free to U.S. citizens or residents with a permanent disability, as the NPS describes it. It can be issued at any age to a person medically determined to have a permanent disability, which doesn’t have to be a 100 percent disability, that severely limits one or more major life activities. Applicants need a photo ID and one of three kinds of documentation: a signed letter from a licensed physician with three specific points, a federal agency document that shows entitlement to disability benefits, or a state agency document that attests to eligibility.
You can pick up a pass in person at over 1,000 federal recreation sites, which the NPS recommends. You can also order a physical pass online through the USGS Online Store, which the NPS says can take up to three weeks to process and deliver, or get a digital pass from Recreation.gov. The NPS page doesn’t list a processing fee, so check the USGS Store and Recreation.gov for any charge before you order. Check each park’s fee page for what the pass covers. Reservations, tours, concession charges and other separate fees may not be reduced by it.
Step 6: Build a Realistic Daily Schedule
Access needs shape pace. Think about the distance between parking and each attraction, the walking or rolling distance, elevation, rest opportunities, transfers, facility hours and the time needed for equipment or support arrangements. Allow for the chance that a planned facility isn’t available.
This is Trip Load applied to the individual. Trip Load, the Miles & Mapped framework, is the time, effort and uncertainty a day demands beyond its mileage. An accessible route with confirmed stops can still carry a high load if the day has too many of them. This guide gives no fixed driving or rest-stop rule, because none fits every traveler. Our miles-per-day guide explains why mileage doesn’t set the day. The aim is to build a schedule around your requirements, not to tell anyone how much they can do.
What Happens When a Planned Stop Isn’t Accessible?
Build the fallback before the stop fails. Identify it ahead of time, not at the place where the original plan breaks down. Options include:
- an alternative viewpoint
- a different visitor facility
- a suitable restroom nearby
- an alternative overnight location
- a shorter or different route segment
- a different attraction that meets your requirements
A fallback you’ve confirmed is part of the plan. One you’ve only thought of is a hope. For the road side of this, our planning guide covers fallbacks and commitment points.
Accessible Road Trip Planning Checklist
- ☐ Define each traveler’s access requirements.
- ☐ Separate non-negotiables from preferences.
- ☐ Confirm accommodation features.
- ☐ Confirm vehicle suitability.
- ☐ Check restrooms and other essential facilities.
- ☐ Verify attraction and park access.
- ☐ Identify the access gaps.
- ☐ Check operating hours and seasonal limits.
- ☐ Confirm important arrangements with operators.
- ☐ Save relevant information for offline use.
- ☐ Identify alternatives for critical stops.
Common Accessible Road Trip Planning Mistakes
- Assuming an accessibility label confirms every feature you need.
- Booking accommodation without checking the actual room configuration.
- Assuming accessible parking guarantees access to the attraction.
- Treating an entire national park as uniformly accessible.
- Leaving vehicle arrangements to the last minute.
- Planning too many stops without counting the access requirements.
- Having no alternative when a stop falls through.
FAQs
How do you plan an accessible road trip? List the traveler’s access requirements first, choose a route from confirmed access, find the access gaps, verify lodging and vehicles, check each park or attraction individually, and keep a fallback for critical stops.
What should you check before booking an accessible hotel? Ask about the specific features you need: the entrance, parking, the route to the room, the bathroom layout and elevators. A label doesn’t answer those. Lodging covered by the ADA has to describe its accessible features in enough detail to judge a room.
Are national parks accessible to wheelchair users? It varies by park, trail and facility. Check each park’s accessibility page for the specific restroom, shuttle, trail or viewpoint you plan to use.
What is the America the Beautiful Access Pass? It’s a lifetime pass, free to U.S. citizens or residents with a permanent disability, that’s part of the America the Beautiful series. The NPS page explains eligibility, documentation and how to get one. Confirm current fees and coverage before you rely on it.
How do you rent a wheelchair-accessible vehicle for a road trip? Check whether the company or specialist provider has a vehicle with the configuration you need, confirm the pickup and return arrangements and book ahead. A standard vehicle with extra space isn’t a wheelchair-accessible vehicle.
How can you find accessible restrooms along a road trip? Confirm them with the operator, and list them as the access points between which you plan. A listing doesn’t confirm a feature, so check hours and the route from parking.
How do you plan a road trip for someone with different access needs? Write each person’s non-negotiables, find the stops that meet all of them, and plan the gaps between those stops. Our guide to road trips for couples covers planning around different travelers.
What should you do if an attraction isn’t accessible? Use the fallback you built in advance: an alternative viewpoint, a different facility or a different segment. Decide before you reach the place where the plan fails.
PLAN YOUR TRIP YOUR WAY
Build a day-by-day itinerary around your time, pace, interests, and budget.
Plan your route around what matters most. Use the Miles & Mapped trip planner to organize your journey, then confirm the access features that make each stop workable with the operators.